
4 steps to prepare kefir cream cheese

Is cream cheese something you can’t live without? Perhaps you wonder how this delicious treat could be available to you every day, with quality ingredients?
Read on for detailed recipe for homemade creamy cheese.
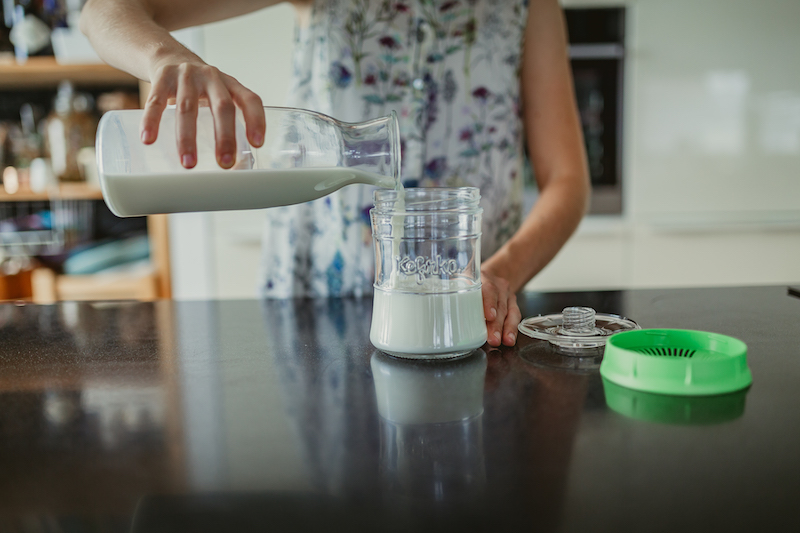
1st Step: Prepare cultured milk
Cheese is made from cultured milk. This basically means that milk needs to thicken, coagulate. Traditionally this was achieved many different ways: by adding vinegar, lemon juice, citric acid, rennet to milk and sometimes heating it to certain temperature.
There is also another way to reach the right consistency – by fermenting it. Adding milk kefir grains to milk and leaving it to ferment in Kefirko Kefir maker for 24 hours or more. You will get thick, creamy milk kefir that is you can use to prepare kefir cream cheese.
2nd Step: Strain the kefir
Creamy kefir may be good for making sauce or salad dressing but for creamy cheese it’s still too much liquid. When using kefir you can easily separate this liquid – whey and there is no need heating it. By using Kefirko Cheese Maker or cheese cloth, you simply strain the cheese for desired time, until the consistency is just right.
Don’t throw away the whey that strains when making kefir cheese. It has many benefits and can be used in various recipes.
With Kefirko Cheese Maker, you pour kefir into the mesh basket and cover it with lid. This will prevent small pieces and flies to fall into the cheese or smells from other food in the fridge. You should put the straining cheese into the fridge to stop or slow down fermentation, this will prevent cheese to become more sour in taste.
3rd Step: Pressing the cheese
You do not have to make this step necessary but it’s a great way to get thicker cheese. Use the pressing spring with disc to squeeze out the remaining whey and get even thicker, more dry cheese. For better result you can leave it to strain with press overnight.
Before pressing you can add salt to cheese, it will flavor the cheese.
With 600 ml of kefir you will make 200-300 g of kefir cheese. Estimated amount using Kefirko products – 848 ml.
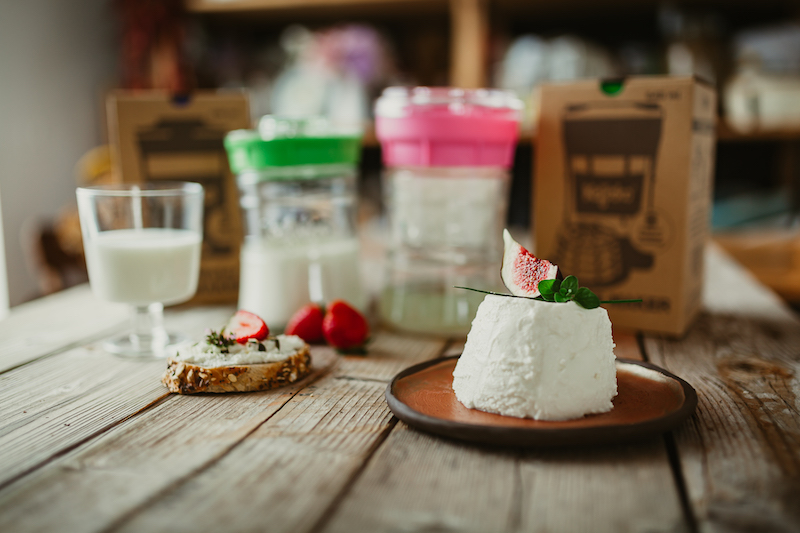
4th Step: Serving the cream cheese
Simply take the cheese out and serve it. If you didn’t add salt before, you can do this now. Or you can make it sweet with fruits or jam. Experiment with different flavours!
You can store homemade cream cheese in container in fridge for up to a week. The time depends on the flavours you added too.
Hope you find this short and simple cream cheese tutorial useful and that cream cheese will now be on your daily menu too.
Get your own Kefirko Cheese Maker here, a successful Kickstarter project:


Will Kefir Cream Cheese re activate if you add it bach to milk.
Hi Len, cream kefir cheese does not include cultures anymore. There might be some weak fermentation happening if you mix that into the milk, but it’s best to work with kefir grains to prepare kefir.